|
How to Begin Practicing B-tele:
Start by putting on your ski boots and finding a moderately firm slope. I highly recommend you try straight-lining (directly gliding down) this slope first?it’s a fundamental and very informative exercise.
Step 1: Set Your Stance
Point both of your toes straight downhill. Make sure the soles of your boots are flat against the slope?meaning, from the toes to the heels, the entire base of each boot is in full contact with the snow surface. This is what we call being “flat.”
If the slope is steep enough, your body will naturally begin to slide. Let it happen. Don’t fight it.
Step 2: Feel the Glide
As you start sliding, pay attention to how your knees are bent. You’ll soon find a natural amount of flex that allows you to glide smoothly and comfortably. This is an important reference point for your stance.
Step 3: Think About Stopping ? Introducing the Brake
The moment you begin to slide, it’s natural to think about how to stop. In skiing, stopping means applying resistance?that’s your brake.
So, how do we create resistance? Most people instinctively do the following:
-
Turn one foot (usually the uphill or mountain-side foot) so that the sole is angled sideways to the fall line.
-
Tilt the boot slightly to engage the outside edge (the edge under your little toe).
-
Extend the leg outward and away from the body, essentially straightening it to create pressure against the snow.
This edge contact and outward push is what creates friction and starts to slow you down.
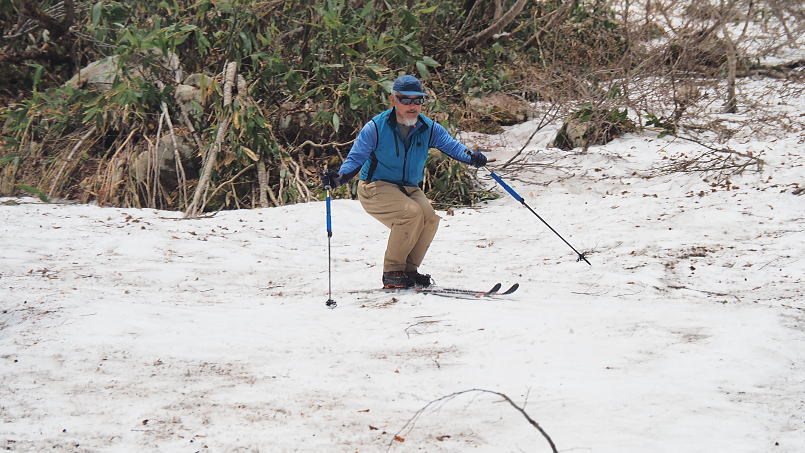
Step 4: Understand Which Leg and Why
Everyone, regardless of instruction, tends to brake using the uphill leg?that is, the leg on the mountain side. More specifically, they use the outside edge of that uphill foot. And they do it by extending the leg, pushing the sole outward and slightly downhill.
This means that right before applying the brake, the joints must have been bent?especially the knee. That’s why we bend the knees during the straight run: so that we have range to extend when it’s time to apply braking pressure.
By actively extending the leg, you scrape the snow. That scraping is your deceleration phase?it’s the start of real speed control.
Step 5: Control Speed Through Positioning
Now, after braking, as you begin to return the sole back toward the fall line, you reduce the resistance. This is your acceleration phase.
Think of it this way:
This simple back-and-forth between leg flexion and extension, combined with edge angle, is how you control speed?not through turning.
Step 6: Add Skis
If you can do all of the above with skis on, you’ve successfully understood the movement. That’s it. It’s very straightforward.
This is B-tele.
You’re not making a traditional turn. You're not doing a telemark turn either. It's a simple method for speed control based on balance, edge use, and leg movement.
|